Sunday, June 30, 2013

Chocolate chips cookies with Nutella and almonds


Hello! Here I am, as promised, to share the recipe of these cookies, that I found here.
I added some minced almonds to the original recipe, cause I had prepared some almond milk and didn't want to toss the leftover nuts; what can I say...even my boyfriend, who is not a chocolate lover (don't know how this is possible) found these cookies really delicious!

235 gr flour
75 gr granulated sugar
50 gr brown sugar
110 gr almonds, minced
113 gr butter, room temperature
1 egg
1/2 tsp salt
1/2 tsp baking powder
1 tsp pure vanilla extract

chocolate chips
Nutella

Mix flour with salt and baking powder.
In a separate bowl beat butter and sugars until pale and fluffy, add the vanilla, then the egg, and mix until combined. Add the dry ingredients, always mixing, and finally the almonds and chocolate chips.
Take a spoon of dough, flatten it on the palm of your hand, distribute some Nutella in the center, and form a ball, so that all the Nutella stays the inside the cookie.
Trasfer the cookies in a parchment-lined baking sheet, spacing them, and bake for at 175° for about 20', until golden.


COOKIES CON GOCCE DI CIOCCOLATA, NUTELLA E MANDORLE


Ciao! Eccomi, come promesso, a condividere la ricetta di questi cookies, trovata qui.
Ho modificato la versione originale aggiungendo delle mandorle tritate, avanzate dalla preparazione del latte di mandorle, e che non mi andava di buttare; che dire...persino il mio ragazzo, che non è un amante del cioccolato (non mi chiedete come sia possibile, non ne ho idea), ha trovato questi cookies davvero deliziosi!

235 gr farina
75 gr zucchero semolato
50 gr brown sugar
110 gr mandorle tritate
113 gr burro morbido
1 uovo
1/2 cucchiaino sale
1/2 cucchiaino lievito per dolci
1 cucchiaino estratto di vaniglia

gocce di cioccolato
Nutella

Mischiate la farina, il sale, e il lievito per dolci.
In un contenitore a parte, lavorate il burro con gli zuccheri fino ad ottenere un composto soffice. A questo punto unire l'estratto di vaniglia, quindi l'uovo, sempre mischiando. Aggiungere poco a poco gli ingredienti secchi, le mandorle e per ultime le gocce di cioccolato.
Preparate i cookies: prendete circa un cucchiaio di impasto, appiattitelo sul palmo della mano, e mettete un po' di Nutella al centro del disco così ottenuto. Chiudete formando una pallina, facendo il modo che la Nutella sia tutta racchiusa nell'impasto.
Trasferite i cookies ben distanziati in una teglia rivestita di carta da forno e cuocete in forno preriscaldato a 175° per 20'-25', finché i cookies diventano dorati.


Thursday, June 27, 2013

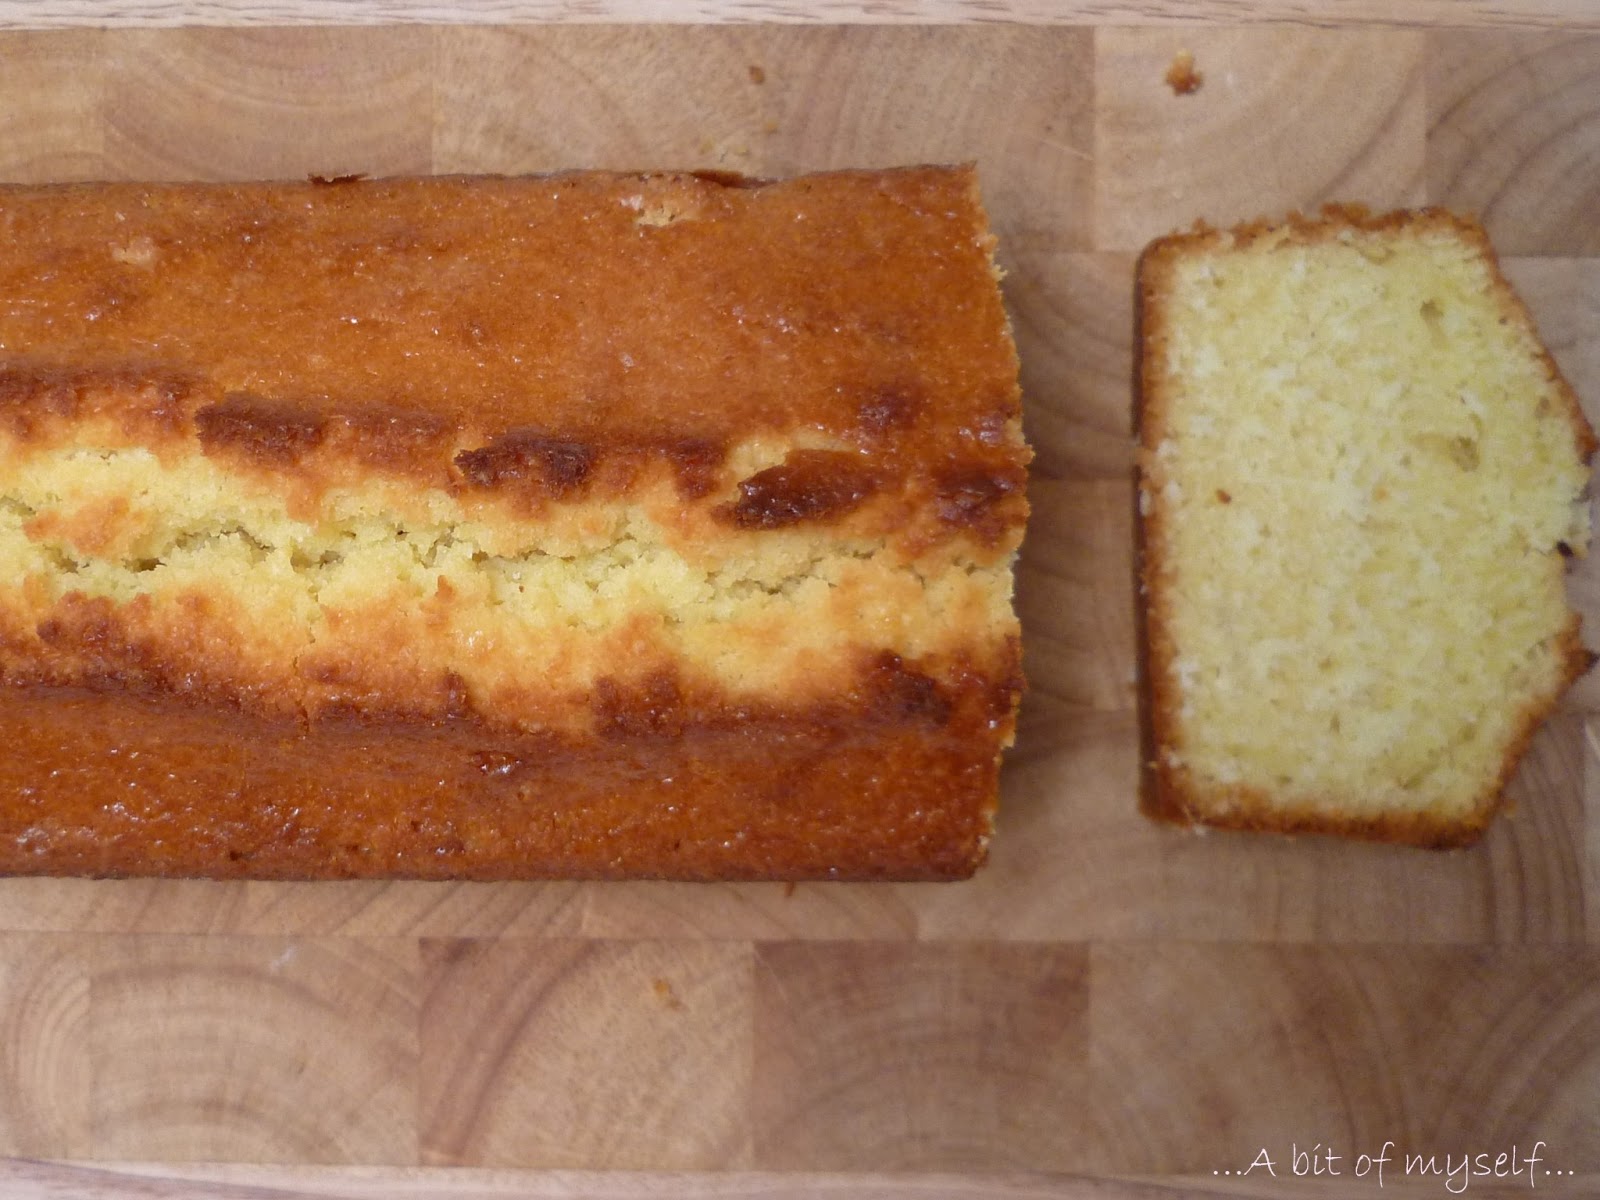
Buttermilk coconut pound cake


After I made pancakes for the first time I have been willing to prepare them again, experimenting a bit with different versions...for this purpose I bought some buttermilk, that I had never used before, but instead of pancakes I made this pound cake...and I don't regret it! :D
The recipe comes again from Martha Stewart's website, and in the original version some buttermilk is used to make a glaze with coconut flour and confectioners' sugar...I skipped this step and as an alternative I suggest to have the cake with some unsweetened greek yogurt...they go really nicely together! :)

260 gr flour
210 gr sugar
170 gr butter
3 eggs
250 ml buttermilk
1 1/2 tsp baking powder
1/2 tsp salt
1 tsp pure vanilla extract
95 gr coconut flour

Preheat the oven at 175°. In a bowl whisk flour, baking powder and salt.
In a separate bowl beat butter with sugar until pale and fluffy, add the vanilla and the eggs, one at the time.
Whisk in the flour in 3 batches, alternating to buttermilk, then fold in the coconut flour with a spatula.
Transfer to a baking pan and bake for 60°. If you use a toothpick to check if the cake is ready, it should still be a bit moisty when you turn the oven off.


According to the original recipe the coconut flour should be toasted, but I didn't. Ops! Still, I really liked it! ^_^


PLUMCAKE AL COCCO E BUTTERMILK

Dopo aver fatto i pancakes per la prima volta, mi sono ripromessa di sperimentarne quante più varianti possibile...e a questo scopo ho comprato del buttermilk (o latticello), che non avevo mai usato prima...ma, invece dei pancakes, ho finito per preparare questa torta...e non me ne pento! :D
La ricetta viene dal sito di Martha Stewart, e nella ricetta originale il latticello è utilizzato anche nella preparazione di una glassa, insieme a della farina di cocco e zucchero a velo. Io ho saltato questo passaggio, ed ho invece accompagnato una bella fetta di questo plumcake con dello yogurt greco,una combinazione davvero azzeccata! :)

260 gr farina
210 gr zucchero
170 gr burro
3 uova
250 ml buttermilk
1 1/2 cucchiaino lievito per dolci
1/2 cucchiaino sale
1 cucchiaino di estratto di vaniglia
95 gr farina di cocco

Preriscaldate il forno a 175°. Mischiate insieme farina, lievito e sale. 
In una ciotola separata battete il burro con lo zucchero fino a raggiungere una consistenza morbida, quindi aggiungete prima la vaniglia, poi le uova, una alla volta. Incorporate la farina in tre fasi, alternandola al latticello. Unite la farina di cocco con l'aiuto di una spatola. Versate in uno stampo da plumcake imburrato e infarinato e cuocete per 60'. Se fate la prova stecchino questo dovrà uscire ancora leggermente umido al momento di sfornare.


Secondo la ricetta originale la farina di cocco andrebbe tostata prima di essere usata, ma io non l'ho fatto! Ops! :D La torta era molto buona lo stesso! ^_^

Thursday, June 20, 2013

Cous-cous and vegetables stuffed peppers


Summer seems to be slowly arriving to Germany as well: hot weather, sunny days, and a few thuderstorms here and there to make the air chilly and pleasantly breezy. This is my favourite season, and to celebrate it I decided to prepare these peppers, that I filled with spicy cous cous and vegetables....and with the leftovers I prepared a very nice cous cous salad that I had for lunch the following day! 

Ingredients: 

3 peppers
1 aubergine
1 zucchini
1 red onion
150 gr cous cous

paprika
curry

First of all prepare the vegetable: chop the aubergine in small cubes, julienne the onion, one pepper and the zucchini. Heat up some oil in a large skillet, add the onion and let it cook for 5'. Add in the aubergines, the pepper, and after about 10 minutes, the zucchini. Salt the vegetables and let them cook until ready. 
Prepare the cous cous: bring 300 ml of salted water to boil, add paprika and curry to your taste, then pour over the cous cous. Stir it with a fork to prevent clumps from forming. When the water has been absorbed  mix the vegetables to the cous cous. 
Finally, wash the two remaining peppers and remove the seeds and the white inner filaments. Cut in half or remove the top, add a tiny bit of oil and some salt, and stuff them with cous cous.
Bake at 200° for 30'.


PEPERONI RIPIENI DI COUS COUS E VERDURE


L'estate sembra essere arrivata anche qui in Germania: sole, caldo, e qualche temporale qui e là a portare un po' di sollievo e ad alzare una brezza piacevolmente fresca. 
Questo è il periodo dell'anno che preferisco; per celebrarne l'arrivo ho quindi deciso di preparare dei peperoni ripieni di verdure e cous cous  aromatizzato con un pizzico di paprika e del curry (spezia che apprezzo molto).
Premetto che sono andata ad occhio con le quantità, e in effetti parte del cous cous e delle verdure è avanzata, ed è diventata un'ottima insalata fredda che ho mangiato a pranzo il giorno dopo.

Ingredienti:

3 peperoni
1 melanzana
1 zucchina
1 cipolla rossa
150 gr cous cous

paprika, curry

Per prima cosa preparate le verdure: lavatele quindi tagliate le melanzane a cubetti, i peperoni, la cipolla e le zucchine a julienne. Soffriggete la cipolla in una padella capiente, quindi aggiungete le melanzane, i peperoni, e, dopo una decina di minuti le zucchine. Salate e lasciate cuocere a fuoco medio finché non saranno pronte.
Preparate il cous cous: in un pentolino portate ad ebollizione 300 gr di acqua salata, a cui aggiungerete curry e paprika a piacere, quindi versatela sul cous cous. Lasciate che l'acqua venga assorbita, mescolando con una forchetta di tanto in tanto per eliminare eventuali grumi. Una volta pronto, mischiate il cous cous alle verdure. 
Prendete i rimanenti peperoni: tagliateli a metà o rimuovete la calotta, lavateli ed eliminate i semi e la parte bianca. Versate un filo di olio evo all'interno e un po' di sale, quindi riempite con il cous cous. 
Infornate per circa 30' a 200 gradi. 


Sunday, June 16, 2013

Coconut milk raspberry muffins with a surprise ;)


I don't know if by now you guys realized that I love coconut: dried, fresh, with Nutella, in both sweet and savory dishes...even my bathfoam is with coconut milk!
This is to say that when I found the recipe of these muffin on the beautiful blog Pan di zenzero I couldn't resist...
I made some changes to the original recipe, due to lack of ingredients and gluttony! :P

90 gr flour
40 gr coconut flour
70 gr brown sugar
120 gr coconut milk
40 gr butter, melted
5 gr baking powder
pinch of salt

Raspberry jam
White chocolate


In a bowl mix together all the dry ingredients: flour, coconut flour, sugar, baking powder and salt.
In a separate bowl whisk the eggs with the melted butter and the coconut milk. Add to the dry ingredients and stir them in quickly.
In a muffin tray pour a spoonful of dough, add a teaspoon of jam and a little square of chocolate, then add another spoon of dough (fill only 2/3 of the muffin mold, cause they will expand while cooking).
Bake at 180° for 20 minutes. Sprinkle with coconou flour (I forgot :P ) and eat! :D

Sorry for the bad and only picture, these muffins really disappeared in a matter of seconds (I guess this is enough to tell how nice this combination is)! :D


MUFFINS AL LATTE DI COCCO E MARMELLATA DI LAMPONI CON SORPRESA ;)


Non so se a questo punto abbiate capito che io adoro il cocco: fresco, essiccato, con la Nutella, nei piatti sia  dolci che salati...pure il mio bagnoschiuma è al cocco! 
Potete immaginare l'estasi che ho provato quando ho letto questa ricetta sul (bellissimo) blog Pan di zenzero...non ho potuto resistere!
Ho apportato alcune modifiche alla versione originale, sia per mancanza di ingredienti, che per gola! :P

90 gr farina
40 gr farina di cocco 
70 gr brown sugar
120 gr latte di cocco
40 gr burro fuso
5 gr lievito per dolci
un pizzico di sale

Marmellata di lamponi
Cioccolato bianco

In un recipiente abbastanza capiente mischiate tutti gli ingredienti secchi: la farina, la farina di cocco, lo zucchero, il lievito e il sale.
In una ciotola a parte sbattete le uova con il latte di cocco e il burro fuso. Unite agli ingredienti secchi e mescolate velocemente. In una teglia da muffin versate una cucchiaiata di impasto, quindi un cucchiaino di marmellata di lamponi un quadratino di cioccolato bianco, infine coprite con l'impasto (arrivate a 2/3 dello stampo).
Cuocete in forno caldo a 180° per 20 minuti. Sfornate, cospargete di farina di cocco (io me la sono scordata! :P) e mangiate! :D

Scusate per la foto, una sola e pure bruttina, ma questi muffin sono scomparsi in un batter d'occhio (credo che questo la dica lunga sulla bontà della combinazione lamponi-cocco)! :D

Friday, June 14, 2013

Quick and easy chicken rolls with ham, cheese and herbs


Since I noticed that I tend to post mainly sweet recipes, I decided to prepare and share these chicken rolls, that are really easy to make, rather quick and very tasty! :)
A good solution for those days in which one has little time but still feels the need for some nice, flavoursome food :)

Ingredients (for 2 people)

4 thin chicken breasts
4 slices of ham (or mortadella)
yellow cheese*

rosemary
sage 
white wine

 *(in my case Gouda, but scamorza or Asiago cheese are also good)

Take the chicken breasts, and thin them down with a tenderizer if necessary. Sprinkle some salt on both sides, then lay a slice of mortadella, and a slice of cheese. Fold the chicken breasts and close them with the help of two toothpicks. Transfer the rolls to an oiled baking tray ,add some rosemary and a few leaves of sage and bake at 200° for about 10 minutes turning them around after 5'. Add some white wine - about 1/2 glass - and  cook for about 10-15 more minutes, depending on the thickness of the meat. Again, turn the rolls around about 5-7 minutes after adding the wine.
If the wine has not evaporated by the time the chicken is ready, remove the rolls and put them aside, and let the sauce evaporate either in the oven, or in a pan over high heat.
Serve the rolls after pourin a couple of spoonfuls of sauceon top. :)


Note: the powder you see on top of my rolls is dried sage...unfortunately I didn't have any fresh leaves, that would have made this recipe even better! :)


FAGOTTINI DI POLLO CON PROSCIUTTO, FORMAGGIO ED ERBE


Per la serie non solo dolci, oggi vi propongo questa ricettina facile, veloce e saporita...perfetta per quelle giornate in cui si ha poco tempo, ma ci si vuole comunque coccolare con qualcosa di appetitoso. :)

Per 2 persone

4 petti di pollo sottili
4 fette di prosciutto cotto (o mortadella)
formaggio a pasta gialla*

Rosmarino
Salvia
Vino bianco

*Io ho usato del Gouda, ma Asiago o scamorza ci stanno benissimo lo stesso

Come prima cosa, se necessario, assottigliate i petti di pollo con l'aiuto di un batticarne, quindi salateli da entrambi i lati. Disponete una fetta di prosciutto cotto (o mortadella) sopra i petti di pollo, quindi il formaggio, chiudete a fagottino e fissate con due stuzzicadenti.
Trasferiteli in una teglia leggermente unta d'olio e cuocete in forno già caldo a 200° per una decina di minuti, rigirando i fagottini dopo 5 minuti, in modo da farli rosolare da entrambi i lati. A questo punto versate circa mezzo bicchiere di vino biano, e cuocete per altri 10'-15', a seconda dello spessore dei petti di pollo. Girate i petti di pollo 5-7 minuti dopo l'aggiunta del vino.
Nel caso in cui i fagottini fossero pronti prima che il vino sia completamente evaporato, rimuoverli dalla teglia e far ridurre la salsina in forno, o in un padellino a fuoco vivo. 
Versare la salsa sui fagottini e servire. :)


La polvere che vedete in foto è salvia essiccata...ovviamente quella fresca conferisce un profumo ancora migliore a questo piatto, ma non mi è riuscito di trovarla... 

Monday, June 10, 2013

Rosemary crunchy crackers


A couple of weeks ago I got this tiny piece of natural yeast (sourdough), sent by my aunt all the way to Germany...it is the first time I deal with such a thing, and I am no expert in breads nor have the time to bake all that often...and this resulted IN a HUGE amount of dough that kept growing and growing, pretty much uncontrolled! Luckily enough I found this easy and quick recipe on the blog Cappuccino e cornetto , so I could use of most of it. Plus, these crackers were my everyday snack when I was in high school. I had to make them! ^_^

200 gr discarded sourdough*
250 gr flour
50 gr butter
2 tbsp olive oil
70 gr water
8 gr salt

rosemary
salt in grains


*the sourdough must be "unfed" . What I do is I feed my sourdough, I keep in the fridge, and after 5 days I take away the part I need for this preparation, and feed the rest. This allows to have reasonable amounts of dough in your fridge without having to throw away the part you discard.

Form a fountain with the flour in a large bowl, add the oil and the butter in the middle.
In a separate bowl, melt the sourdough in 70 gr of warm water, then add to the flour. Mix briefly, then add the salt (you do this cause salt should never directly touch yeast), and knead until you get a smooth dough. Roll it down into a sheet about 3-4 mm thick, cut it into rectangles and distribute them on a parchment lined baking sheet. Brush each cracker with an emulsion of oil and water, then sprinke with rosemary and a few grains of salt. Bake at 190 degrees for 20-30' until golden.


I brushed the crackers with oil andd water so that the salt would stick to them, and the rosemary wouldn't burn. I also tried different versions: with paprika, olives, speck, cheese and black pepper...you can have fun trying different ones!


SCHIACCIATINE AL ROSMARINO CON GLI ESUBERI LIEVITO MADRE


Un paio di settimane fa mi è arrivato un pezzettino di lievito madre, mandato da mia zia da Roma fino a qui, in Germania...è la prima volta che ho a che fare con la pasta madre, non sono un'esperta in panificazione, e non nemmeno tanto tempo durante la settimana per preparare pani e lievitati...la naturale conseguenza di tutto ciò è stata ritrovarmi dopo pochissimo tempo con una quantità SPROPOSITATA di lievito madre che cresceva praticamente incontrollato...O_o
Per fortuna ho trovato questa ricetta sul blog della simpaticissima Cranberry, Cappuccino e cornetto, che mi ha permesso di smaltire un po' di esuberi. E poi le schiacciatine erano la mia merenda ai tempi del liceo, perciò non potevo non provare! ^_^
Riporto ingredienti  e preparazione

200 gr lievito madre non rinfrescato
250 gr farina 0
50 gr burro
2 cucchiai d'olio
70 gr acqua
8 gr sale

rosmarino,
sale grosso

In una ciotola capiente disporre la farina a fontana e porre al centro il burro e l'olio.
A parte sciogliere il lievito madre nei 70 gr di acqua tiepida, versarla al centro della fontana e impastare brevemente. Aggiungere il sale e continuare a lavorare finché non otterrete un impasto liscio. Stenderlo con l'aiuto di un mattarello fino ad ottenere una sfoglia non troppo spessa (circa 3-4 mm), ritagliate le vostre schiacciatine, spennellatele con un'emulsione di acqua e olio, e cospargetele di sale grosso e aghi di rosmarino. Infornate a 190° per 20-30 minuti, finchè non saranno ben dorate.


Ho spennellato le schiacciatine con olio e acqua per far sì che il sale grosso non cadesse via, e per prevenire la bruciatura degli aghi di rosmarino.
Ho preparato queste schiacciatine in numerose varianti: alla paprika, allo speck, alle olive, al formaggio e pepe...insomma, c'è da sbizzarrirsi! :)

Sunday, June 9, 2013

Peanut butter raspberry jam thumbprint cookies


Hello again! It's a bright, warm Sunday morning and here I am, sharing with you another recipe "stolen" from Martha Stewart's website! :)
I have to warn you though, if you are looking for something light, you might as well stop reading right now, 'cause these cookies are, let's say, quite rich! ^_^
I have been willing to try peanut butter cookies for a while, and in the end I choose this one, as it also gave me the chance to try it in combination with jam...I heard nice things about it, and I must say...they are true! Try and see for yourseleves! :)

Ingredients:

1 1/4 cups (170 gr) flour
1 large egg
1 stick (113 g) softened butter
3/4 cup (130 gr) peanut butter
1/3  cup  (65 gr) light-brown sugar
1/3 cup (65 gr) granulated sugar
1 tsp pure vanilla extract
1/2 tsp baking powder
1/2 tsp baking soda
1/tsp salt

Raspberry jam (can be replaced with any jam)
granulated sugar for rolling

Preheat the oven at 175°.
Mix flour, baking powder, baking soda and salt. In a separate bowl, whisk butter and peanut butter until you get a smooth mixture.


Add the sugars and whisk until pale and fluffy, then pour in the vanilla extract and the egg. Add the flour mixture and mix until combined.


Form balls with about 1 tbsp of dough, roll them in sugar and distribute them on a parchment lined baking sheet, spacing them as they will flatten out while baking.
Bake at 175° for 10 minutes, take them out and delicately press the center of the cookies to form small craters in your cookies :)
Supposedly one could/should (?) do it with a thumb (hence the name of the recipe) but I don't see how one could stick a finger in such a hot thing without consequences! :D  Strong supporter of the "better safe than sorry" phylosophy I opted for the back of a wooden spoon!
Here are the dough spheres before baking


...after 10' in the oven...


...and the poked ones :D


Sorry for the last picture, I took it with my phone :\
Cook for 6-7 more minutes, until golden. Let them cool down completely, then warm up the jam for a few seconds, just so that it gets a bit more liquid and it is easier to pour in the cookies. Spoon about 1 teaspoon into each crater...and enjoy!


BISCOTTI AL BURRO D'ARACHIDI E MARMELLATA DI LAMPONI


Ciao a tutti! E' una domenica mattina calda e soleggiata, ed eccomi qui, a condividere un'altra ricetta "rubata al sito di Martha Stewart! :)
Vi avverto: se siete a dieta e cercate qualcosa di leggero, potete smettere di leggere questo post, perchè questi biscotti sono, come dire...piuttosto ricchi! ^_^
Era da un po' che volevo provare una ricetta di biscotti al burro di arachidi; dopo tanto cercare ho scelto questa, perché mi ha permesso di sperimentare la tanto lodata combinazione di questa crema spalmabile con la marmellata...beh, le lodi sono più che giustificate! Provate e verificate voi stessi!

Ingredienti:

1 1/4 cups (170 gr) farina
1 uovo grande
1 stick (113 g) burro morbido
3/4 cup (130 gr) burro di arachidi
1/3  cup  (65 gr) light-brown sugar - o zucchero di canna
1/3 cup (65 gr) zucchero
1 cucchiaino di estratto di vaniglia
1/2 cucchiaino lievito per dolci
1/2  cucchiaino bicarbonato
1/2  cucchiaino sale

Marmellata di lamponi (si può sostituire con una qualunque marmellata)
Zucchero per la copertura

Unite la farina, il lievito, il bicarbonato e il sale.
In una ciotola a parte sbattete il burro morbido con il burro di arachidi finché otterrete un composto liscio.


Aggiungete lo zucchero di canna (o il brown sugar) e lo zucchero semolato, e sbattete finché otterrete un composto bianco e morbido. Aggiungete l'uovo e l'estratto di vaniglia e mescolate, infine unite gli ingredienti secchi, lavorandoli finché non saranno completamente amalgamati.


Formate delle sfere con circa 1 cucchiaio di impasto, rotolatele nello zucchero e disponetele ben distanziate su una placca rivestita di carta da forno.
Infornate a 175° per 10 minuti, quindi sfornatele e premete delicatamente il centro dei biscotti per formare dei piccoli crateri :)
In teoria questa operazione potrebbe/dovrebbe (?) essere fatta con il pollice (da qui il nome thumpbrints - impronta di pollice :D), ma non riesco ad immaginare come uno possa infilare un dito in una cosa così calda senza conseguenze! Per la serie "meglio restare sul sicuro" ho optato per il manico di un cucchiaio di legno!
Ecco le palline passate nello zucchero prima di essere infornate


...dopo 10 minuti in forno...


...e quelle con ditata (o cucchiaiata, fate voi) :D


Scusate per l'ultima foto, è  fatta con il cellulare.. :\
Cuocete per altri 6-7 minuti, finché i dolcetti non saranno dorati. Lasciate raffreddare completamente, quindi scaldate appena la marmellata, giusto il tempo necessario affinché diventi un po' liquida, e versatene circa 1 cucchiaino in ogni craterino...buon appetito! 


Tuesday, June 4, 2013

Strawberry syrup and raspberry pancakes!


I made these pancakes on Sunday morning, following a recipe I found on Martha Stewart's website. The introductory comment to the recipe reads: "When you see how simple it is to whip them up from scratch, you'll wonder why you never did it before"...soooo true! I had never had/made pancakes before, and I fell in love with their puffiness! There will not be another Sunday without them! ^_^
The topping is an home-made strawberry syrup and some fresh raspberries. It was gorgeous!

1 cup (150 gr) flour
2 tbsp (30 gr) sugar
2 tsp (7 gr) baking powder
1 cup (250 ml) milk
2 tbsp (30 gr) unsalted butter melted
1 egg
1/2 tsp salt

oil for the pan

Mix together all the dry ingredients: flour, baking powder, sugar and salt.
In a separate bowl whisk the eggs with the milk and the butter, add the dry ingredients and mix in quickly and briefly. If a few lumps stay that's not a problem, you should avoid overmixing the dough.


Warm a non-stick pan and oil it slightly with an oiled paper sheet. Pour 2 or 3 tablespoon of mixture, and cook until bubbles form and start to explode (about 2 minutes).


Flip the pancake and cook for another 2 minutes.


Repeat until the dough is over, oling the pan with the paper towel if necessary
To keep them warm I followed the suggestion given on the website: I warmed up the oven at about 100 degrees, turned it off, and put it the ready made pancakes on a parchment line baking sheet.

As for the topping I had previously prepared some strawberry syrup with the following ingredients:

250 gr fresh strawberries
200 ml water
100 gr sugar

Pour the strawberries with half of the water in a blender with the sugar, and blend until smooth. Sieve the strawberry puree in a saucepan with the remaining water. Boil it up until you get the desired thickness.
I used half of this syrup for a cake I had prepared, and that I will post soon...before preparing the pancakes I boiled the remainig half to make it thicker.


Everything is ready now...Pile up the pancakes, pour the strawberry syrup and decorate with raspberries...Soooo yummy!


We ate all 10 of them the same morning!


PANCAKES ALLO SCIROPPO DI FRAGOLE E LAMPONI


Ho preparato questi pancakes la scorsa domenica, seguendo la ricetta del sito di Martha Stewart.
L'introduzione alla ricetta recita: "Quando scoprirete quanto è facile prepararli, vi chiederete perchè non l'avete mai fatto prima"...mai cosa fu più vera! Non avevo mai mangiato pancakes, e mi sono letteralmente innamorata della loro consistenza soffice...Non ci sarà più una domenica senza pancakes! ^_^ 
Il topping consiste in uno sciroppo di fragole fatto da me e dei lamponi freschi...meraviglioso!
Ecco la ricetta:


150 gr (1 tazza) di farina
30 gr (2 cucchiai) di zucchero
7 gr (2 cucchiaini) di lievito
250 ml (1 tazza) di latte
30 gr (2 cucchiai) di burro sciolto
1 uovo 
1/2 cucchiaino di sale

Olio per ungere la padella.

Unite tra di loro tutti gli ingredienti secchi: la farina, il lievito, lo zucchero e il sale.
In un recipiente separato mescolate dapprima tutti gli ingredienti liquidi (l'uovo, il burro fuso e il latte), quindi unite gli ingredienti secchi e mescolate rapidamente. Se rimangono un po' di grumi non fa niente, è importante non mischiare troppo il composto.


Scaldate una padella antiaderente ed ungetela con un fazzoletto bagnato con poco olio di semi. Versate 2 o 3 cucchiaiate di composto e cuocete un paio di minuti, finché non si formano delle bolle in superficie, che iniziano a scoppiare. 


Girate il pancake e cuocete ancora per un paio di minuti.


Ripetete il procedimento fino a terminare l'impasto, oliando la padella con il tovagliolo di cui sopra, se necessario.
Per tenere i pancakes in caldo ho seguito il suggerimento dato nel sito : ho scaldato il forno a 100 gradi, l'ho spento e ho infornato i pancakes appena fatti, riponendoli su una teglia foderata con carta da forno. 

Per il topping ho usato uno scriroppo alle fragole che avevo preparato in precedenza con:

250 gr fragole
200 ml acqua
100 gr zucchero

Frullate le fragole con metà dell'acqua e lo zucchero, quindi filtrate il composto con un colino a maglie strette in un pentolino dove verserete anche la restante acqua. Portate a ebollizione e terminate la cottura quando avrete ottenuto la densità voluta. 
Metà di questa preparazione era servita da bagna per una torta che ho preparato, e che presto giungerà ad arricchire queste pagine; quando ho preparato i pancakes ho ridotto la bagna ad uno sciroppo denso facendola bollire ulteriormente.  


A questo punto è tutto pronto: impilate i pancakes, versate abbondante sciroppo e decorate con dei lamponi freschi...una delizia!


Noi ce li siamo mangiati tutti e 10 in un lampo!