Friday, September 6, 2013
Recycled food is good: basmati rice ramekins with zucchini and speck with melted mozzarella center
Hello everybody! Here I am, back from my holidays at the sea side! After waiting for sooo long -it really felt like it was forever - I could finally enjoy the sea, the beach and some good, relaxed quality time! The weather wasn't great but still I am very happy that we managed to arrange this holiday: I feel so much better!
After a few quite intense working days I finally manage to find some time to update my blog, with a quick and easy recipe made basically from random leftover food I had in the fridge. A perfect solution for those hectic after-holidays days, when you know at what time you get in the office, but you never know when you're gonna get out - but you still want to eat some nice food!
This dish was born out of some leftover basmati rice and a zucchini that was near the end of its days, and a new set of ramekins that I absolutely wanted to use! :P
So here is what you're going to need:
1/2 cup of basmati rice, already cooked (about 100 gr)
1 zucchini
1/2 onion
50 gr diced speck
mozzarella
grated parmesan
Quick and easy: fry the diced onion and the speck in a medium skillet, then add the julienned zucchini and let it cook. When almost ready add salt and stir in the rice, so that the flavours can mix. Take your rameskins (I needed 4), pour in some of the rice mixture, so that they are half full, then add a piece of mozzarella, that will become your melted yummy center! Cover with more rice, sprinkle with parmesan (don't be stingy), and pour just a little bit of olive oil on top of the cheese.
Bake at 200° in pre-heated oven for about 10 minutes, or until you get a brown, crunchy crust.
Eat warm!
I didn't have it at that time, but I think that saffron would give a nice additional touch to the dish.
Aaaaaaand stay tuned! I started a new hobby and can't wait to show you the results! Those who also follow me on my Facebook page already saw a couple of shots...as for the other...well, why don't you follow me!? ;) Just kidding, my awesome fantastic little creation will be presented on these pages soon!
Bye and thank you all for reading me, commenting, keeping me company in this tiny little corner I built for myself, it really gives me a lot! ^_^
Byeee!
RICETTA DI RICICLO: COCOTTINE DI RISO BASMATI CON ZUCCHINE E SPECK DAL CUORE FILANTE
Ciao a tutti! Eccomi tornata da una settimana di vacanze al mare! Dopo un'attesa che mi e' sembrata eterna sono riuscita finalmente a godermi spiagge, bagni e relax! Il tempo non e' stato proprio dalla nostra parte, ma sono comunque strafelice di essermi concessa questa vacanza! Mi ha davvero ricaricata!
Dopo una serie di giornate lavorative piuttosto intense riesco finalmente ad aggiornare il mio blog...con una ricetta riciclo facile e veloce, ottima per queste giornate frenetiche post-ferie...quando sai a che ora entri in ufficio, ma non sai a che ora uscirai - ma la voglia di coccolarsi con il cibo è ancora lì!
Quest piatto e' nato proprio così, da avanzi di riso basmati, una zucchina solitaria quasi giunta alla fine dei suoi giorni, e delle cocottine nuove di zecca che volevo assolutamente battezzare! :P
Ma veniamo a noi...vi serivranno:
1/2 tazza di riso basmati (circa 100 gr) - già cotto
1 zucchina
1/2 cipolla
50 gr di speck a cubetti
mozzarella
parmigiano grattugiato
Facile e veloce: in una padella rosolate la cipolla e lo speck in un filo di olio extravergine di oliva, quindi aggiungere la zucchina tagliata a julienne e lasciate cuocere. A cottura quasi ultimata aggiustate di sale e aggiungete il riso, mescolandolo per farlo insaporire. A questo punto prendete le cocottine (io ne ho usate 4 in tutto), riempitele fino a metà, quindi aggiungete un pezzetto di mozzarella, che andrà a formare il cuore filante dei vostri tortini :P Coprite con altro riso, distribuite il parmigiano sulla superficie e versate un filo d'olio. Infornate in forno già caldo a 200° per una decina di minuti, o finchè il formaggio avrà formato una crosticina bella croccante!
Servite caldi!
All'epoca non ne avevo in casa, ma credo che lo zafferano starebbe molto bene in questa preparazione. MAgari lo provate e mi fate sapere? ;)
E poooi presto prestissimo vi mostrerò i risultati di un nuovo hobby! Chi di voi mi segue sulla mia pagina Facebook ha già visto qualche scatto...gli altri...beh, perchè non mi seguite!?!?! ;) Scherzo, le mie nuove opere saranno presto su queste pagine!
Un saluto a tutti, e grazie voi che mi leggete, che lasciate un vostro pensiero, che mi tenete compagnia in questo angolino che mi sono costruita, mi fa immensamente piacere! ^_^
A presto!
Sunday, August 18, 2013
Don't tell the shepard...
...in Italy we have this saying, that would translate to "Don't tell the shepard how nice cheese is with pears"...well I discovered a new cheese-frut combination! :P
Apparently this is quite popular in Bulgaria, and I must sayI can see why!
Watermelon and feta cheese, or even grapes and feta (a bit less summery)...fresh and tasty, and the textures combine very well together! Maybe some of you could be a bit dubious, but so were my non italian friends when I mentioned that we have ham and melon! :D So don't be suspicious and try, taste, experiment! :D
Ok, this is not a recipe, more like a tip, let's say...but it's still summer (at least that's what they say, considering the 16 degrees and the giant clouds) and I am in holiday mood :P
I might disappear for a while, maybe will share some of my non-edible creations (wow, sounds pro :P)...I wish you all a nice end of August, and read you soon! ;)
AL CONTADINO NON FAR SAPERE....
...com'è buono...il cocomero con la feta! Eh si, ho scoperto da poco questa combinazione frutta-formaggio, e devo dire che mi piace molto! A quanto pare è un piatto piuttosto comune in Bulgaria, anche feta e uva è da provare! I sapori e le consistenze si amalgamo in maniera davvero gradevole, in più è un piatto fresco, adatto ai mesi caldi! Immagino che alcuni di voi possano essere un po' perplessi, ma non vi dico la faccia che hanno fatto i miei amici non italiani quando gli ho parlato di prosciutto e melone! :D Quindi su, non siate diffidenti, provate, assaggiate, sperimentate!
Ok, questa non è proprio una ricetta, più un suggerimento, ma è estate (o così dicono visti il 16 gradi e i nuvoloni grigi) e io sono in modalità vacanza! :P
Potrei sparire per un po', o pubblicare qualcuna delle mie creazioni (sembra quasi professionale) non commestibili...vi auguro una buona fine di Agosto, e ci si rilegge presto! ;)
Etichette:
Bulgarian recipes,
Cheese,
Cooking,
Fruit
Wednesday, July 31, 2013
Muscovado caramel cookies
Finally I made them too! And finally I found the time to sit down for a little bit and write a new post!
I've been quite busy at work lately, and I also felt a bit lazy, but I decided it's time to bring some life to my blog, so here we are. :)
The recipe for these cookies is by Luca Montersino, a very famous Italian confectioner, and they are simply gorgeous! They are prepared using brown sugar and Muscovado sugar, that is a very flavorsome. The only tricky part of the recipe the dry caramel, quite burning prone, but it is totally worth the effort!
Here's what you're gonna need:
90 gr brown sugar
25 gr cream
175 gr butter
25 gr Muscovado sugar
275 gr flour
Start preparing the dry caramel: pour some brown sugar (one or two spoonfuls) in a pot over medium heat and when it liquifies and starts caramelizing add another spoon. Repeat the procedure until the brown sugar is over. Add the cream being careful not to get burnt as hot steam will be produced and the cream might boil violently and splatter. At this point, away from the stove, add in the butter little by little, stirring energetically. If it separates from the caramel it won't be a problem. Let the mixture cool down completely and finally add flour and Muscovado sugar and mix until combine. Roll down the dough into a sheet between two parchment paper foils and let it rest in the fridge for half a day.
Once this time has passed, cut the cookies, roll them into some more Muscovado sugar and
bake them at 180 degrees for 12-13 minutes.
I made these cookies twice so far, once only with cane sugar (and they were delicious even like this), and once with Muscovado sugar. The second ones were a bit sweeter according to me, but a bit more aromatic due to the presence of Muscovado. They reminded me of some cookies the have around Germany around Christmas, so next time I will experiment adding some ginger and almonds, because I think they will fit very nicely.
If you want some tips on how to make caramel, David Lebovitz's website provides very useful information, also regarding some precautions you might want to take not to get burnt (caramel can be pretty nasty in this respect).
What else can I say? Try them!!!
FROLLINI AL CARAMELLO MUSCOVADO
Finalmente ce l'ho fatta! Dopo un periodo piuttosto intenso a lavoro e uno successivo di enorme pigrizia, ho trovato il tempo e la voglia di sedermi davanti al pc e aggiornare il blog! Lo stavo abbandonando un po' poverino...!
La ricetta di questi biscotti è dell'ormai conosciutissimo Luca Montersino, è la prima che provo delle sue, e devo dire che è fantastica! L'ingrediente segreto, per così dire, è una qualità di zucchero di canna chiamato Muscovado, molto molto profumato! L'unico passaggio che richiede un po' di attenzione è la preparazione del caramello a secco, perchè (ahimè ne sono testimone) è abbastanza facile da bruciare, e a quel punto lo si deve buttare...ma in ogni caso ne vale assolutamente la pena!
Ecco quello che vi servirà:
90 gr zucchero di canna
25 gr panna
175 gr burro
25 gr zucchero Muscovado
275 gr farina
Come prima cosa preparate il caramello a secco: in un pentolino scaldate poco zucchero di canna, e, solo quando sarà completamente caramellato, aggiungete un altro cucchiaio di zucchero. Attendetene la caramellizzazione e aggiungete altro zucchero; ripetete il procedimento fino a terminare i 90 grammi previsti dalla ricetta. A questo punto unite la panna bollente, facendo attenzione a non scottarvi perchè il composto bollirà in maniera piuttosto forte. Allontanatevi dal fuoco e unite il burro poco a poco mischiando vigorosamente per amalgamarlo al caramello (anche se i due composti resteranno un po' separati non preoccupatevi). Lasciate raffreddare quindi unite la farina e lo zucchero Muscovado. Stendete l'impasto aiutandovi con due fogli di carta da forno - meglio se potete già stenderlo all'altezza desiderata - e lasciatelo riposare in frigo per mezza giornata (io di solito lo preparo il giorno prima).
Passato questo tempo, estraete l'impasto dal frigo, se necessario stendetelo ancora, e ritagliate i biscotti della forma che preferite. Cospargeteli con altro zucchero Muscovado e cuoceteli in forno già caldo a 180° per 12-13 minuti.
Ho preparato questi biscotti due volte finora, una solo con zucchero di canna (ed erano deliziosi già così), una con zucchero di canna e Muscovado, come da ricetta. Nel secondo caso li ho trovati leggermente più dolci, ma anche più aromatici, vista la presenza del Muscovado. Il sapore ricorda un po' quello di alcuni biscotti che trovo qui in Germania, specialmente nel periodo natalizio, perciò la prossima volta sperimenterò aggiungendo dello zenzero e delle mandorle a filetti :D
Se volete alcuni consigli sulla preparazione del caramello, il sito di David Lebovitz fornisce alcune informazioni piuttosto utili, anche riguardo ad alcuni accorgimenti utili a non ustionarsi (il caramello è un po' tremendo in questo senso). Che altro? Provateli!
Sunday, June 30, 2013
Chocolate chips cookies with Nutella and almonds
Hello! Here I am, as promised, to share the recipe of these cookies, that I found here.
I added some minced almonds to the original recipe, cause I had prepared some almond milk and didn't want to toss the leftover nuts; what can I say...even my boyfriend, who is not a chocolate lover (don't know how this is possible) found these cookies really delicious!
235 gr flour
75 gr granulated sugar
50 gr brown sugar
110 gr almonds, minced
113 gr butter, room temperature
1 egg
1/2 tsp salt
1/2 tsp baking powder
1 tsp pure vanilla extract
chocolate chips
Nutella
Mix flour with salt and baking powder.
In a separate bowl beat butter and sugars until pale and fluffy, add the vanilla, then the egg, and mix until combined. Add the dry ingredients, always mixing, and finally the almonds and chocolate chips.
Take a spoon of dough, flatten it on the palm of your hand, distribute some Nutella in the center, and form a ball, so that all the Nutella stays the inside the cookie.
Trasfer the cookies in a parchment-lined baking sheet, spacing them, and bake for at 175° for about 20', until golden.
COOKIES CON GOCCE DI CIOCCOLATA, NUTELLA E MANDORLE
Ho modificato la versione originale aggiungendo delle mandorle tritate, avanzate dalla preparazione del latte di mandorle, e che non mi andava di buttare; che dire...persino il mio ragazzo, che non è un amante del cioccolato (non mi chiedete come sia possibile, non ne ho idea), ha trovato questi cookies davvero deliziosi!
235 gr farina
75 gr zucchero semolato
50 gr brown sugar
110 gr mandorle tritate
113 gr burro morbido
1 uovo
1/2 cucchiaino sale
1/2 cucchiaino lievito per dolci
1 cucchiaino estratto di vaniglia
gocce di cioccolato
Nutella
Mischiate la farina, il sale, e il lievito per dolci.
In un contenitore a parte, lavorate il burro con gli zuccheri fino ad ottenere un composto soffice. A questo punto unire l'estratto di vaniglia, quindi l'uovo, sempre mischiando. Aggiungere poco a poco gli ingredienti secchi, le mandorle e per ultime le gocce di cioccolato.
Preparate i cookies: prendete circa un cucchiaio di impasto, appiattitelo sul palmo della mano, e mettete un po' di Nutella al centro del disco così ottenuto. Chiudete formando una pallina, facendo il modo che la Nutella sia tutta racchiusa nell'impasto.
Trasferite i cookies ben distanziati in una teglia rivestita di carta da forno e cuocete in forno preriscaldato a 175° per 20'-25', finché i cookies diventano dorati.
Thursday, June 27, 2013
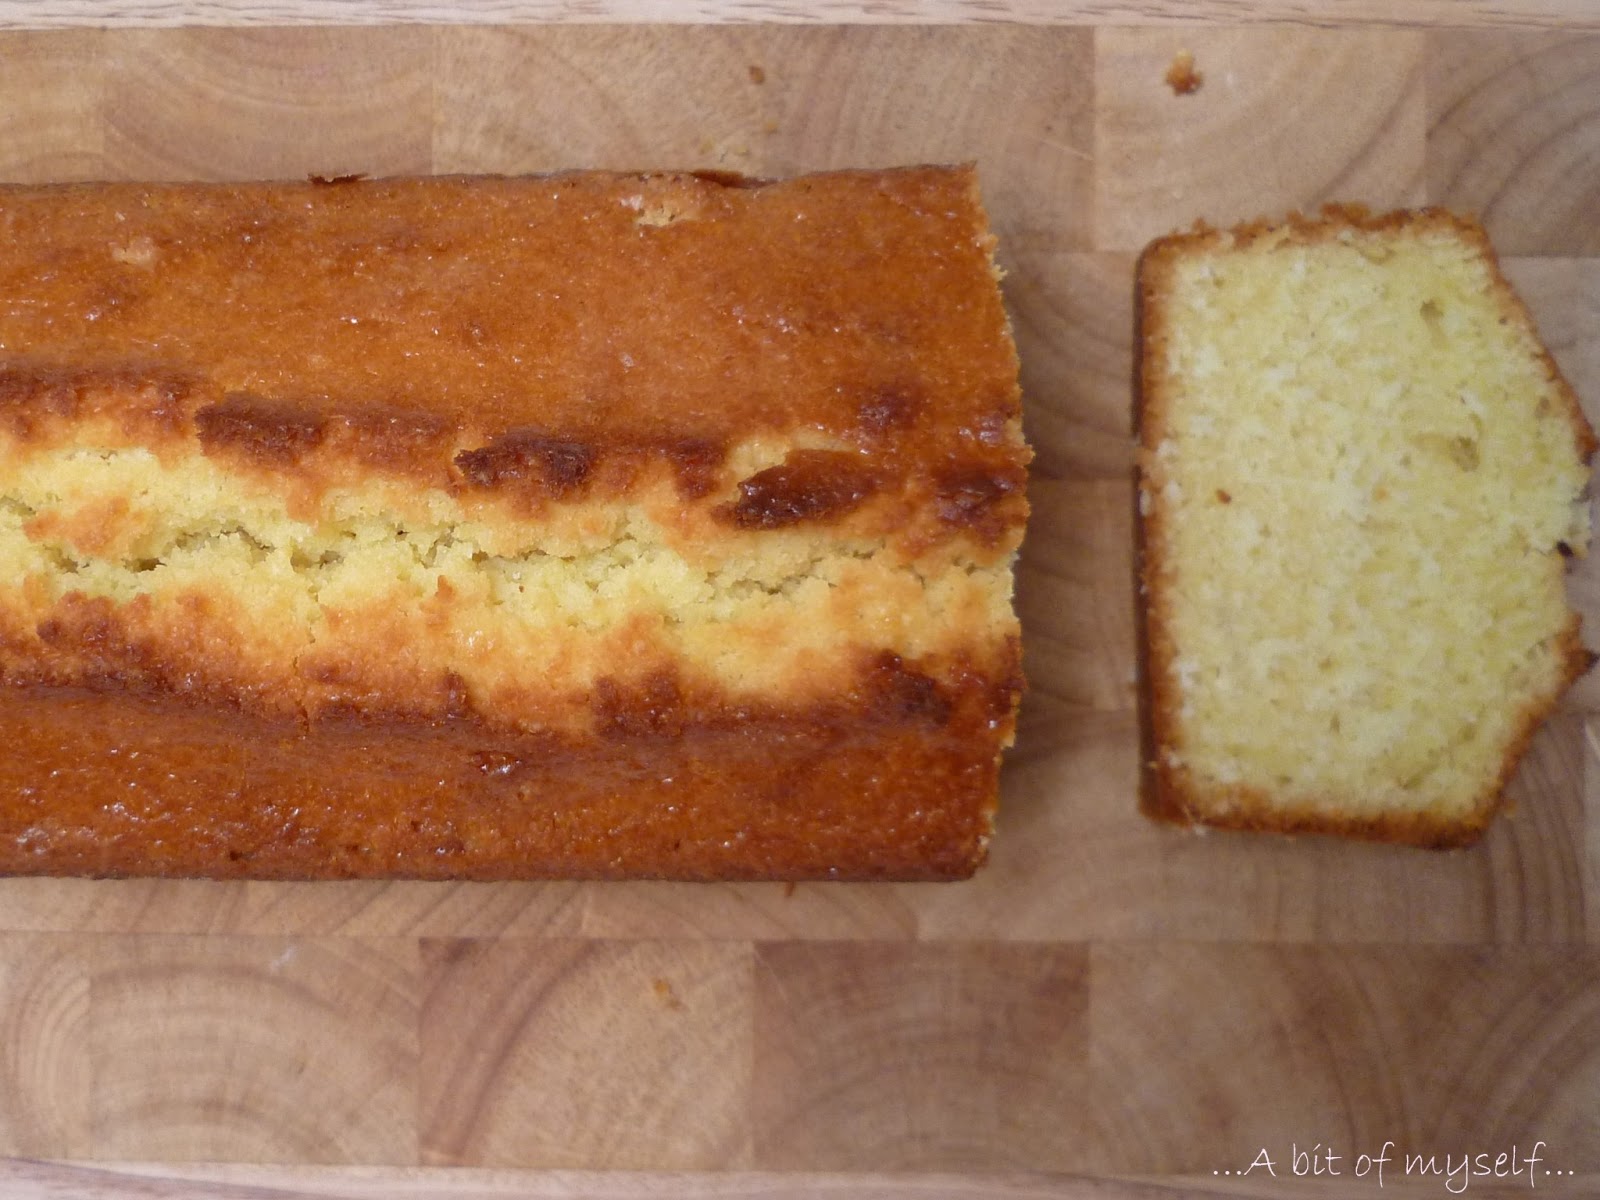
Buttermilk coconut pound cake
After I made pancakes for the first time I have been willing to prepare them again, experimenting a bit with different versions...for this purpose I bought some buttermilk, that I had never used before, but instead of pancakes I made this pound cake...and I don't regret it! :D
The recipe comes again from Martha Stewart's website, and in the original version some buttermilk is used to make a glaze with coconut flour and confectioners' sugar...I skipped this step and as an alternative I suggest to have the cake with some unsweetened greek yogurt...they go really nicely together! :)
260 gr flour
210 gr sugar
170 gr butter
3 eggs
250 ml buttermilk
1 1/2 tsp baking powder1/2 tsp salt
1 tsp pure vanilla extract
95 gr coconut flour
Preheat the oven at 175°. In a bowl whisk flour, baking powder and salt.
In a separate bowl beat butter with sugar until pale and fluffy, add the vanilla and the eggs, one at the time.
Whisk in the flour in 3 batches, alternating to buttermilk, then fold in the coconut flour with a spatula.
Transfer to a baking pan and bake for 60°. If you use a toothpick to check if the cake is ready, it should still be a bit moisty when you turn the oven off.
According to the original recipe the coconut flour should be toasted, but I didn't. Ops! Still, I really liked it! ^_^
PLUMCAKE AL COCCO E BUTTERMILK
Dopo aver fatto i pancakes per la prima volta, mi sono ripromessa di sperimentarne quante più varianti possibile...e a questo scopo ho comprato del buttermilk (o latticello), che non avevo mai usato prima...ma, invece dei pancakes, ho finito per preparare questa torta...e non me ne pento! :D
La ricetta viene dal sito di Martha Stewart, e nella ricetta originale il latticello è utilizzato anche nella preparazione di una glassa, insieme a della farina di cocco e zucchero a velo. Io ho saltato questo passaggio, ed ho invece accompagnato una bella fetta di questo plumcake con dello yogurt greco,una combinazione davvero azzeccata! :)
260 gr farina
210 gr zucchero
170 gr burro
3 uova
250 ml buttermilk
1 1/2 cucchiaino lievito per dolci1/2 cucchiaino sale
1 cucchiaino di estratto di vaniglia
95 gr farina di cocco
Preriscaldate il forno a 175°. Mischiate insieme farina, lievito e sale.
In una ciotola separata battete il burro con lo zucchero fino a raggiungere una consistenza morbida, quindi aggiungete prima la vaniglia, poi le uova, una alla volta. Incorporate la farina in tre fasi, alternandola al latticello. Unite la farina di cocco con l'aiuto di una spatola. Versate in uno stampo da plumcake imburrato e infarinato e cuocete per 60'. Se fate la prova stecchino questo dovrà uscire ancora leggermente umido al momento di sfornare.
Secondo la ricetta originale la farina di cocco andrebbe tostata prima di essere usata, ma io non l'ho fatto! Ops! :D La torta era molto buona lo stesso! ^_^
Thursday, June 20, 2013
Cous-cous and vegetables stuffed peppers
Summer seems to be slowly arriving to Germany as well: hot weather, sunny days, and a few thuderstorms here and there to make the air chilly and pleasantly breezy. This is my favourite season, and to celebrate it I decided to prepare these peppers, that I filled with spicy cous cous and vegetables....and with the leftovers I prepared a very nice cous cous salad that I had for lunch the following day!
Ingredients:
3 peppers
1 aubergine
1 zucchini
1 red onion
150 gr cous cous
paprika
curry
First of all prepare the vegetable: chop the aubergine in small cubes, julienne the onion, one pepper and the zucchini. Heat up some oil in a large skillet, add the onion and let it cook for 5'. Add in the aubergines, the pepper, and after about 10 minutes, the zucchini. Salt the vegetables and let them cook until ready.
Prepare the cous cous: bring 300 ml of salted water to boil, add paprika and curry to your taste, then pour over the cous cous. Stir it with a fork to prevent clumps from forming. When the water has been absorbed mix the vegetables to the cous cous.
Finally, wash the two remaining peppers and remove the seeds and the white inner filaments. Cut in half or remove the top, add a tiny bit of oil and some salt, and stuff them with cous cous.
Bake at 200° for 30'.
PEPERONI RIPIENI DI COUS COUS E VERDURE
L'estate sembra essere arrivata anche qui in Germania: sole, caldo, e qualche temporale qui e là a portare un po' di sollievo e ad alzare una brezza piacevolmente fresca.
Questo è il periodo dell'anno che preferisco; per celebrarne l'arrivo ho quindi deciso di preparare dei peperoni ripieni di verdure e cous cous aromatizzato con un pizzico di paprika e del curry (spezia che apprezzo molto).
Premetto che sono andata ad occhio con le quantità, e in effetti parte del cous cous e delle verdure è avanzata, ed è diventata un'ottima insalata fredda che ho mangiato a pranzo il giorno dopo.
Ingredienti:
3 peperoni
1 melanzana
1 zucchina
1 cipolla rossa
150 gr cous cous
paprika, curry
Per prima cosa preparate le verdure: lavatele quindi tagliate le melanzane a cubetti, i peperoni, la cipolla e le zucchine a julienne. Soffriggete la cipolla in una padella capiente, quindi aggiungete le melanzane, i peperoni, e, dopo una decina di minuti le zucchine. Salate e lasciate cuocere a fuoco medio finché non saranno pronte.
Preparate il cous cous: in un pentolino portate ad ebollizione 300 gr di acqua salata, a cui aggiungerete curry e paprika a piacere, quindi versatela sul cous cous. Lasciate che l'acqua venga assorbita, mescolando con una forchetta di tanto in tanto per eliminare eventuali grumi. Una volta pronto, mischiate il cous cous alle verdure.
Prendete i rimanenti peperoni: tagliateli a metà o rimuovete la calotta, lavateli ed eliminate i semi e la parte bianca. Versate un filo di olio evo all'interno e un po' di sale, quindi riempite con il cous cous.
Infornate per circa 30' a 200 gradi.
Sunday, June 16, 2013
Coconut milk raspberry muffins with a surprise ;)
I don't know if by now you guys realized that I love coconut: dried, fresh, with Nutella, in both sweet and savory dishes...even my bathfoam is with coconut milk!
This is to say that when I found the recipe of these muffin on the beautiful blog Pan di zenzero I couldn't resist...
I made some changes to the original recipe, due to lack of ingredients and gluttony! :P
90 gr flour
40 gr coconut flour
70 gr brown sugar
120 gr coconut milk
40 gr butter, melted
5 gr baking powder
pinch of salt
Raspberry jam
White chocolate
In a bowl mix together all the dry ingredients: flour, coconut flour, sugar, baking powder and salt.
In a separate bowl whisk the eggs with the melted butter and the coconut milk. Add to the dry ingredients and stir them in quickly.
In a muffin tray pour a spoonful of dough, add a teaspoon of jam and a little square of chocolate, then add another spoon of dough (fill only 2/3 of the muffin mold, cause they will expand while cooking).
Bake at 180° for 20 minutes. Sprinkle with coconou flour (I forgot :P ) and eat! :D
Sorry for the bad and only picture, these muffins really disappeared in a matter of seconds (I guess this is enough to tell how nice this combination is)! :D
MUFFINS AL LATTE DI COCCO E MARMELLATA DI LAMPONI CON SORPRESA ;)
Non so se a questo punto abbiate capito che io adoro il cocco: fresco, essiccato, con la Nutella, nei piatti sia dolci che salati...pure il mio bagnoschiuma è al cocco!
Potete immaginare l'estasi che ho provato quando ho letto questa ricetta sul (bellissimo) blog Pan di zenzero...non ho potuto resistere!
Ho apportato alcune modifiche alla versione originale, sia per mancanza di ingredienti, che per gola! :P
90 gr farina
40 gr farina di cocco
70 gr brown sugar
120 gr latte di cocco
40 gr burro fuso
5 gr lievito per dolci
un pizzico di sale
Marmellata di lamponi
Cioccolato bianco
In un recipiente abbastanza capiente mischiate tutti gli ingredienti secchi: la farina, la farina di cocco, lo zucchero, il lievito e il sale.
In una ciotola a parte sbattete le uova con il latte di cocco e il burro fuso. Unite agli ingredienti secchi e mescolate velocemente. In una teglia da muffin versate una cucchiaiata di impasto, quindi un cucchiaino di marmellata di lamponi un quadratino di cioccolato bianco, infine coprite con l'impasto (arrivate a 2/3 dello stampo).
Cuocete in forno caldo a 180° per 20 minuti. Sfornate, cospargete di farina di cocco (io me la sono scordata! :P) e mangiate! :D
Scusate per la foto, una sola e pure bruttina, ma questi muffin sono scomparsi in un batter d'occhio (credo che questo la dica lunga sulla bontà della combinazione lamponi-cocco)! :D
Etichette:
Chocolate,
Coconut,
Cooking,
Muffins,
Raspberries
Subscribe to:
Posts (Atom)